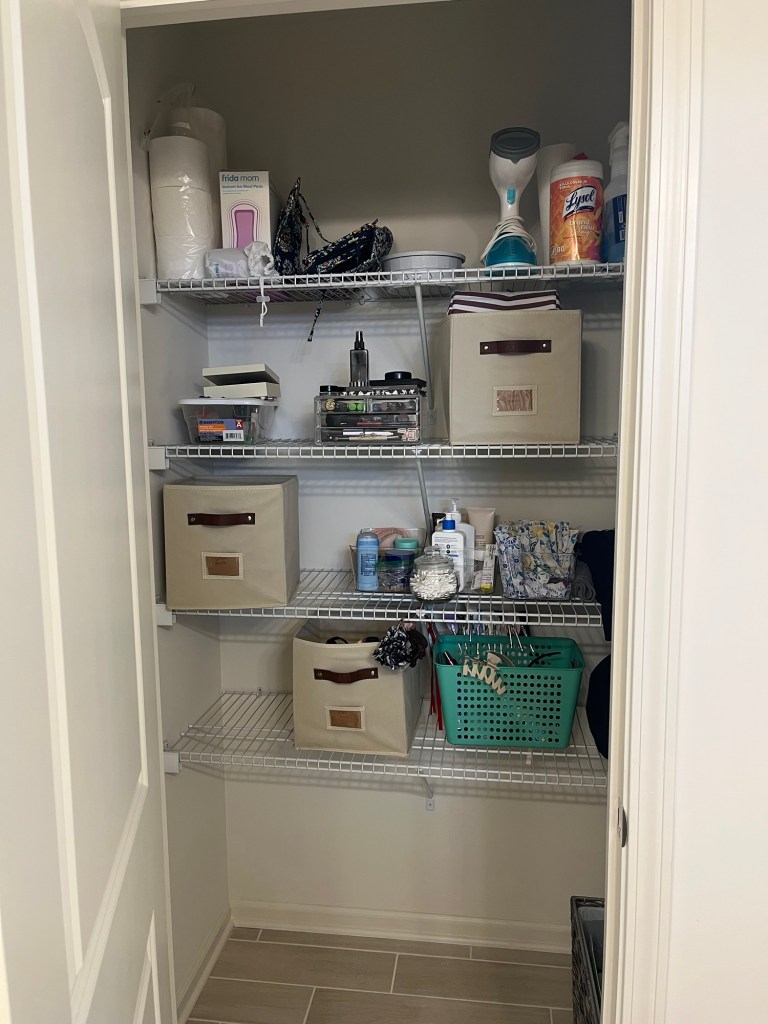
I woke up ready to be productive and found myself staring at a linen closet that had been neglected since we moved in. It was chaotic, hard to navigate, and honestly, a little stressful every time I needed something. With a busy week ahead, I decided it was finally time to tackle it and I didn’t need any fancy organizers or complicated systems. Just some bins, baskets, and a little bit of elbow grease.
I started by emptying everything out of the closet and laying it on our bathroom counter. The first thing I grabbed was a clear acrylic container holding some of my feminine products. I opened the boxes, consolidated everything that would fit into the container, and placed the leftover items in a fabric cube that had been holding socks but wasn’t in use anymore. That cube is now officially our “restock items” bin.
Next up: medicines. I grabbed another fabric cube and organized our children’s medicine, our own medications, and bandaids into a “first aid” bin. Then it was time for hair products and tools. A teal basket and an old feminine pads box had been holding a jumble of products. I moved all the hot tools into another fabric cube and neatly arranged the hair products and accessories back into the teal basket.
Enjoying this cozy corner of the blog? Subscribe to get new posts delivered straight to your inbox and join me for all things home, DIY, and cozy living!
Finally, I tackled expired makeup and nail products. Everything I no longer use was discarded, and the rest found a home in an acrylic organizer that had been sitting unused in the closet for years.
It’s not the prettiest or most aesthetic, but it works and that’s all that matters!
Now, opening our linen closet is no longer overwhelming. Everyone knows where everything is, and even if you don’t, a quick peek in a bin or basket is all it takes. The best part? You don’t need fancy organizers, just corralling like items in a bin is a huge improvement over letting everything sit freely on wire shelving.
It’s such a satisfying feeling to see a once chaotic space finally neat and functional. Sometimes, all it takes is a little bit of time, some bins, and the willingness to toss what’s no longer serving you.
My parents are always up to something creative, but their latest project might be my favorite yet. They built an accent wall in their living room. It started out as a simple paint refresh and turned into a full-on DIY adventure, complete with multiple hardware store stops, a few minor injuries, and plenty of laughter.
The Inspiration
When I asked what inspired them, my mom immediately said,
“I saw it on Instagram! I’m just trying to get rid of that builder-grade look.”
My dad, on the other hand, admitted,
“I didn’t want to do it. It looks good. I’m just saying.”
It all started with an empty wall that just felt too plain. They painted it first, thinking that would be enough but after living with it for a bit, they both agreed it still needed something more. So the idea for a box-trim accent wall was born.
Planning the Layout
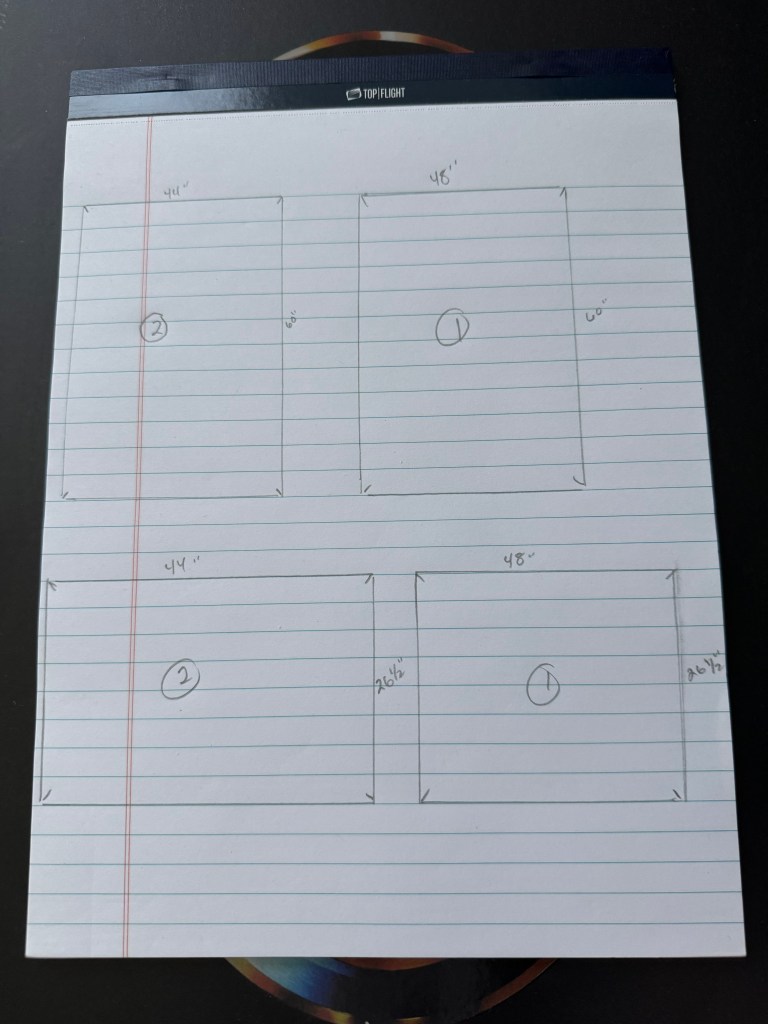
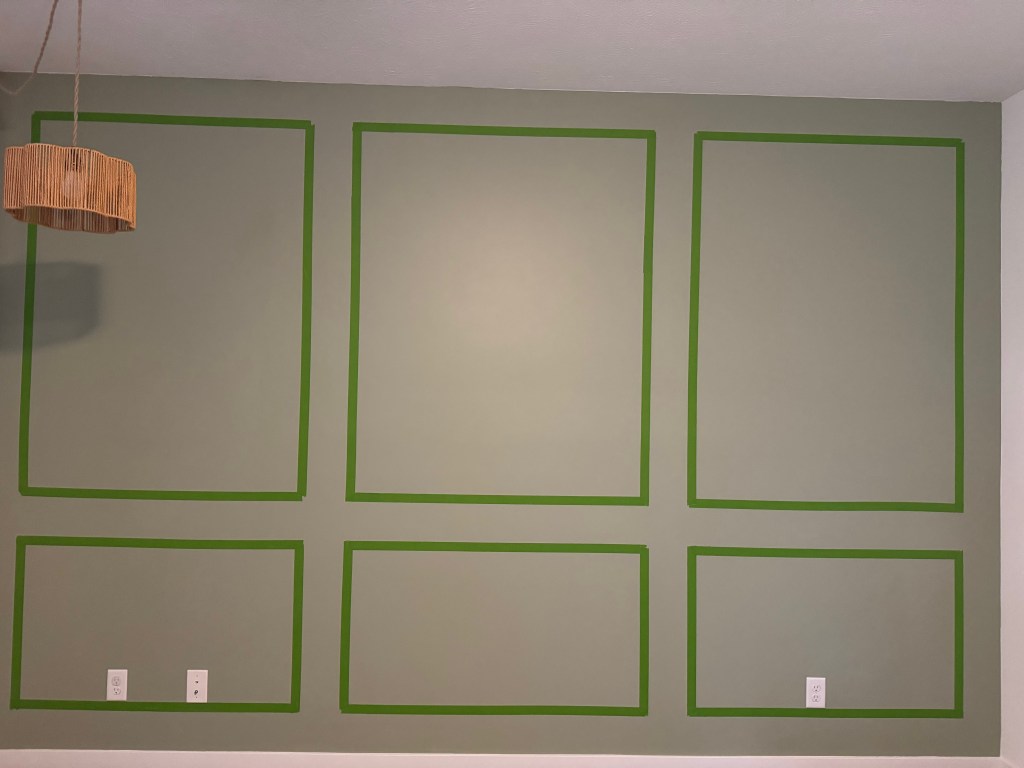
They began the old-fashioned way: with pen and paper. My dad measured (and re-measured) the wall to decide how many boxes they wanted. Once they had a rough plan, they taped out the design on the wall and left it up for a couple of weeks just to make sure they liked the layout before committing.
When it was finally time to start, they made a list of supplies and headed out for what was supposed to be a quick trip to Home Depot.
Except… they accidentally drove to Lowe’s.
By the time they realized, they were already at the back of the store in the tool section. So, naturally, they turned around, left Lowe’s, and went to Home Depot where they bought a new level, nailer, nails, and caulk. Unfortunately, the wood selection was a letdown. My dad tried cutting a piece himself, but it chipped. “Junk,” he said. My mom wasn’t impressed either.
So off they went again. This time to Menards, which they both agreed had the best wood selection (and cheaper prices, too).
After all that, they stopped by our house to borrow a saw and a battery… but ended up visiting the rest of the night instead. The next morning, they finally got to work.
Building the Wall
Once they got started, things moved pretty quickly. Between cutting, nailing, and double-checking every measurement, they worked from about 10:30 a.m. to 2:30 p.m., with a break for lunch and some distractions from the football games (the project was completed on a Sunday).
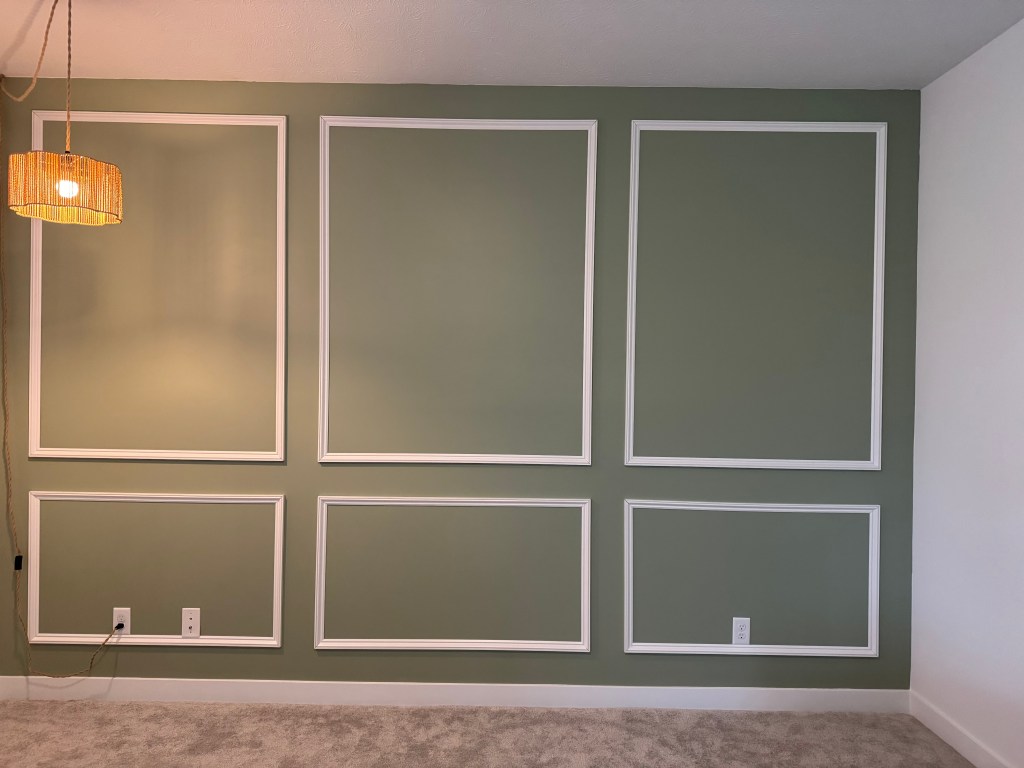
The wall features 12 pieces of 8-foot MDF base cap molding, about 1.5 inches wide, attached with a pin nailer and finished with paintable caulk.
There were a few battle wounds along the way…my dad managed to cut his finger (no idea how) and hit another with the nail gun. Luckily, it didn’t go through. While recalling the nail hitting his finger, he went on a tangent about the time he stapled 2 of his fingers together. It was very traumatic so if you ever get the chance, be sure to ask about it. He swears it’s the worst pain he’s ever felt: the staple, not pin nail.
What They Learned
Like most DIY projects, there were lessons along the way.
“Cut a little extra and dry fit before cutting again,” my dad said.
“And if you’re doing a big wall, you can’t do it alone — those top boxes were five feet tall!”
He also offered some advice for anyone trying this at home:
Nail in the center of each board first to help line it up before securing the rest. Don’t rush the measuring: “Measure, remeasure, and then measure again.” Use a baby wipe to smooth out caulk for a clean finish. “It takes it right off the wall. No mess.”
When I asked what the hardest part was, they both laughed.
Dad: “Figuring out the spacing to make it look uniform.”
Mom: “Listening to your dad complain about it and waiting on him to do it!”
And the best part?
“We bought exactly the right amount of wood,” my dad said proudly. “Didn’t cut a single piece wrong.”
The Finished Look
The finished wall completely transformed their living room. The clean lines and subtle texture make the space feel more custom and collected. Exactly what my mom was going for. My dad says,
“It’s up there. It’s up there good. It’s up there straight. It looks good.”
Which, coming from him, is high praise.
Their next step is buying paintable outlet covers so they blend in seamlessly with the wall.
My mom’s already dreaming up their next project: wood slats in the entryway. My dad’s a little less enthusiastic, but I think we all know how this story ends…with another beautiful wall and a few more laughs along the way.
Final Thoughts
What I love most about their accent wall isn’t just how good it looks (and it really does look great). It’s the mix of teamwork, patience, and humor that went into it. DIY projects can be messy and unpredictable, but they’re also full of stories and this one perfectly fits them: equal parts determination and comedy.
Some of the links in this post are affiliate links, which means I may earn a small commission at no extra cost to you. As an Amazon Associate, I earn from qualifying purchases.
When we moved into our new house three years ago, I fell in love with the kitchen — bright, white, and full of light. It felt fresh and new, and at the time, that was exactly what I wanted.
But as the years passed, I started to realize that “bright and white” can also feel a little… sterile. My kitchen reminded me more of a doctor’s office than a cozy home. So I decided it was time to bring in some warmth and personality. Starting small, with one little corner of the counter.
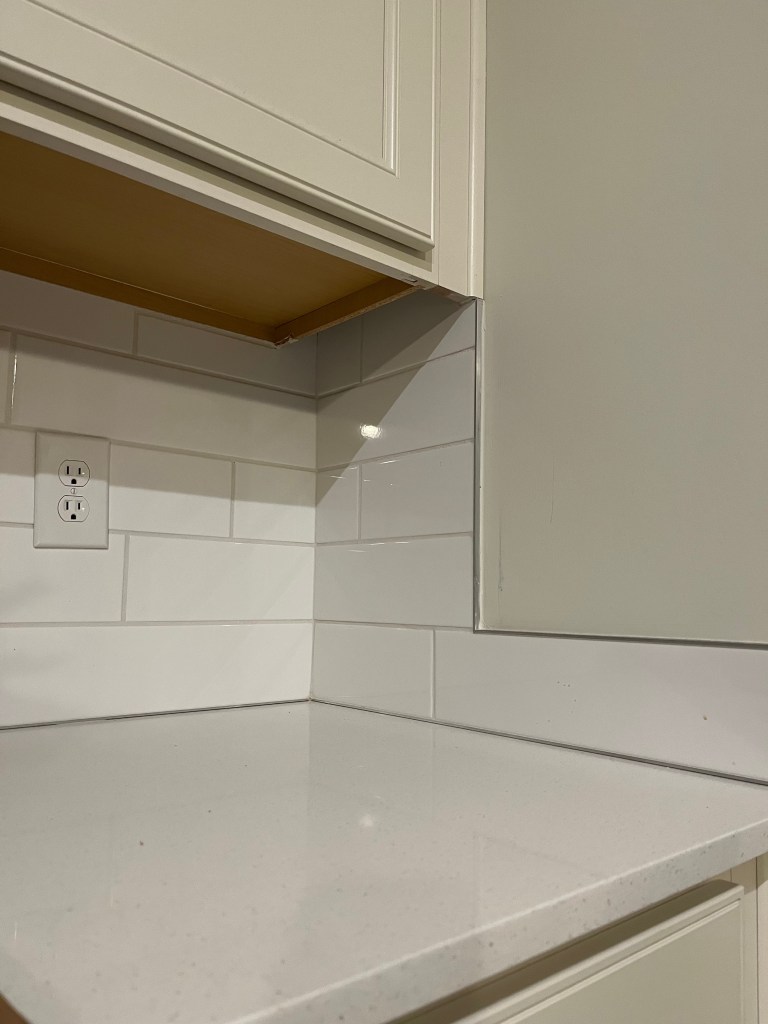
Step 1: Clear & Define the Space
This corner wasn’t doing much before. Sometimes I’d toss a basket of fruit there, but mostly it was just empty. A dead zone.
Still, counter space is valuable, and I wanted every inch of it to feel intentional. So, I cleared it off and gave it a purpose.
Step 2: Add a Base Layer
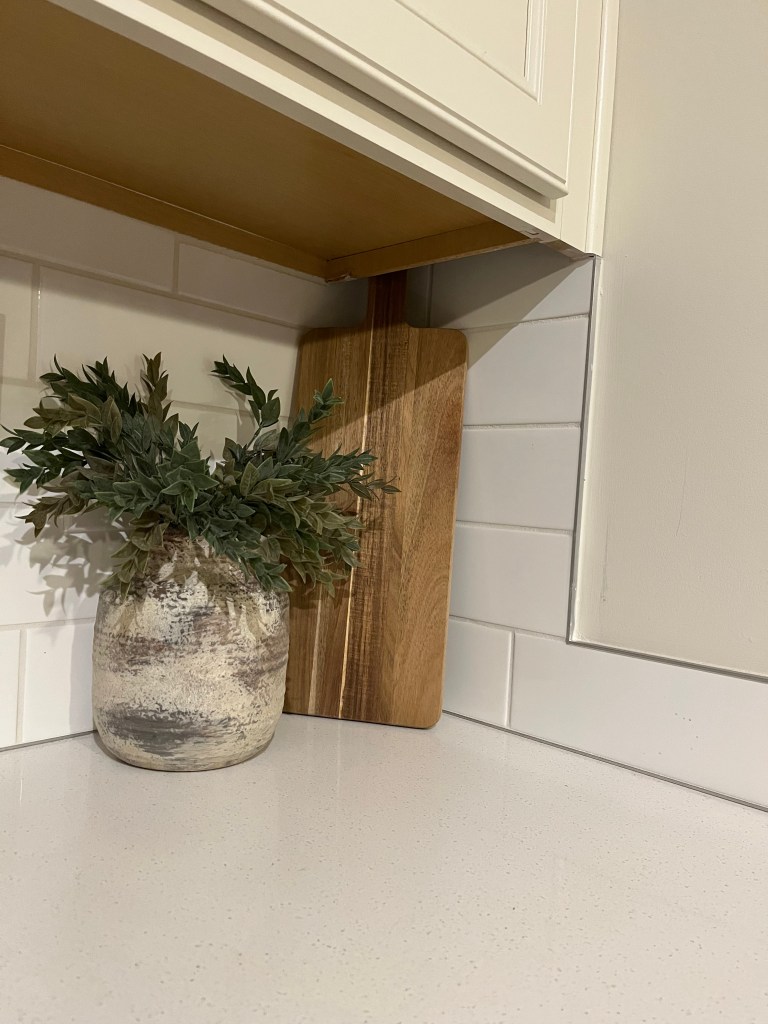
Every styled area needs a base. Something to anchor everything else. For this corner, I started with a beautiful wooden serving tray. It’s long and narrow, and when leaned casually in the corner, it adds instant warmth and texture. (It’s actually a bit too tall to stand upright perfectly, but I love that imperfect, “collected over time” look.)
Some of the links in this post are affiliate links. I may earn a small commission if you make a purchase at no extra cost to you.
Next came the fun part: layering texture. The warm wood of the tray already helped break up all the white, but I wanted to add some movement and color.
I placed a simple beige vase with faux greenery to bring in something organic, and a little lamp that doubles as a candle warmer. When it’s on, it fills the kitchen with a cozy, subtle scent and gives off the softest glow.
I didn’t buy anything new for this step. I just gathered a few pieces from around the house and played around until it felt right. The mix of heights, materials, and tones made all the difference.
If you want to try something similar, here are a few sources:
Here’s everything I used to decorate our little corner:
Personal touches are what make a house feel like home. I never want my spaces to feel like they belong in a magazine. I want them to feel lived in.
For me, scent is a big part of that. I love when people walk in and immediately say, “Wow, your house smells amazing.” Right now, it’s my favorite fall candle from Bath & Body Works, but in the spring I swap it for one from a local shop. Little seasonal touches like that keep things feeling fresh and personal.
Step 5: Step Back & Admire
Once everything was in place, I stepped back and took a look. Then I did a little editing. Added something, took something away, until it felt just right.
Love cozy home projects and bookish finds? Subscribe to stay in the loop and never miss a post!
In the end, I kept it simple: a board, a vase, and a lamp. Cozy, but not cluttered.
It’s amazing what styling one small corner can do for your whole kitchen.
That once-empty space now feels warm, layered, and collected. Exactly what I was craving.
If you’ve been putting off decorating because you don’t know where to start, start small. Pick one corner — maybe your counter, an entry table, or a nightstand — and play around. That’s where the magic happens. ✨
Thanks for chatting! What little corner in your home could use some warmth?
Some of the links in this post are affiliate links, which means I may earn a small commission at no extra cost to you. As an Amazon Associate, I earn from qualifying purchases.
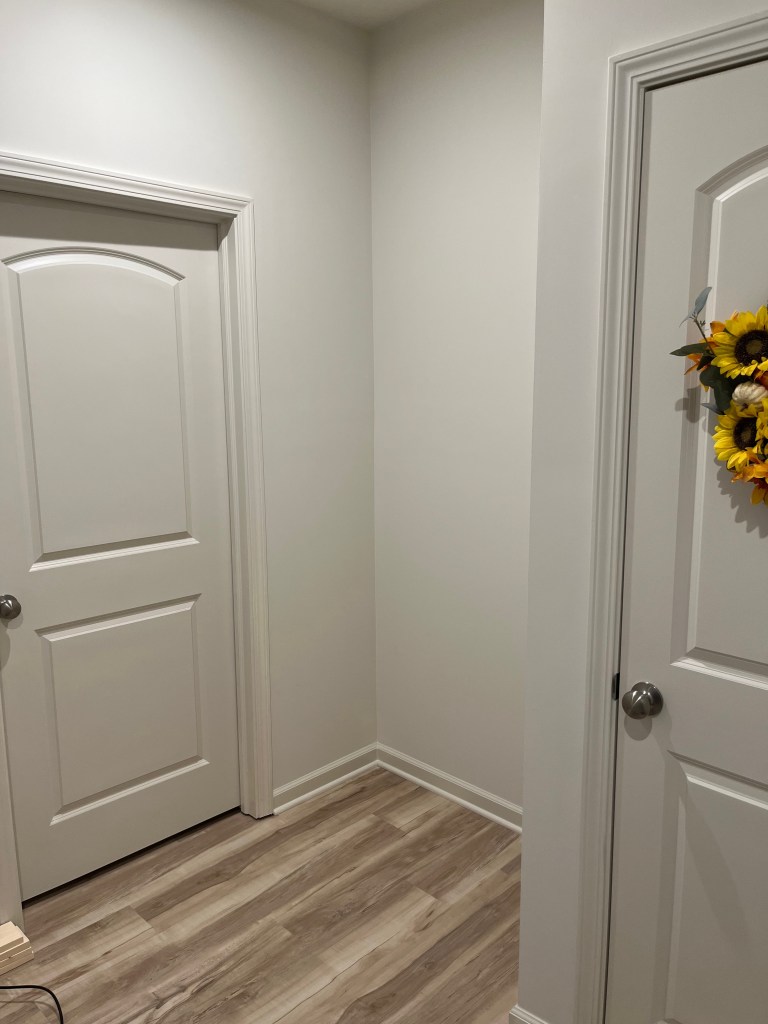
When we moved into our home, there was this little niche by the door that just looked like it was meant to be a mudroom bench. You know those spaces that practically beg to be turned into something useful and cozy? This was one of those.
The little niche that started it all – just begging for a bench.
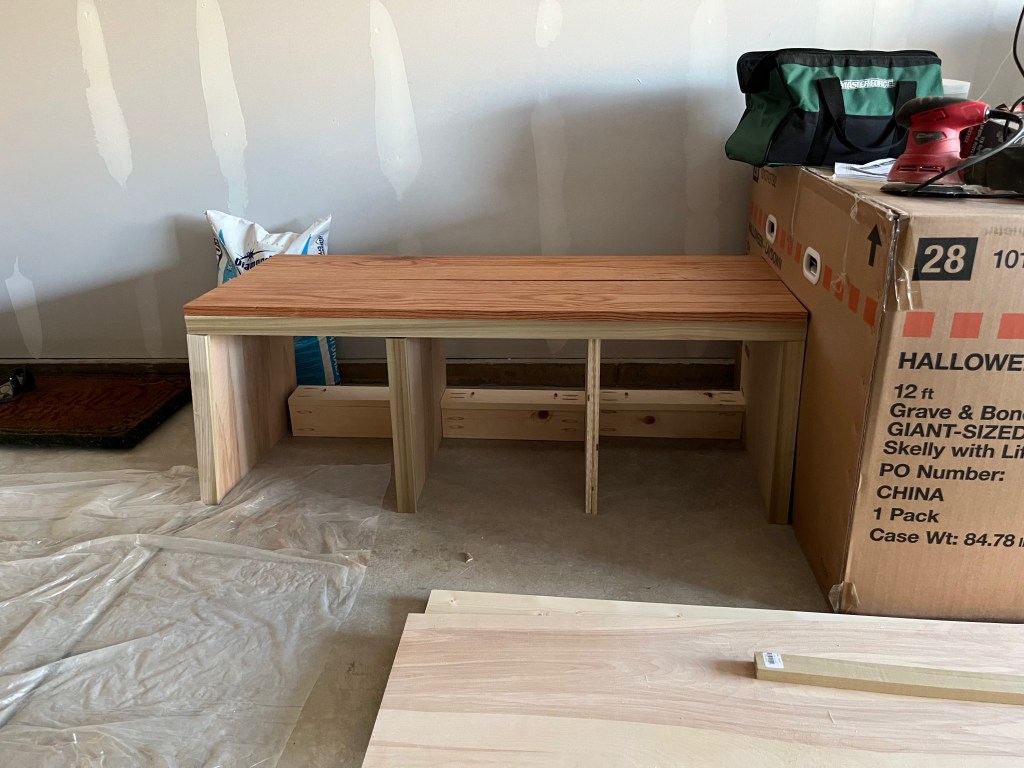
It only took us… about a year and a half to finally start the project. But once we did, my husband and I spent three weekends bringing it to life. It could be a weekend project if you’ve got uninterrupted time but with a toddler running around, we worked in short bursts during naps and whenever the grandparents could come over to play.
Fitting the wood into the spaceMe flexing my painting skillsMe helping assemble the bench baseMy dad and husband placing the bench!!
The Not-So-Straight Walls
One of our biggest challenges? The walls. They were not straight, and the corners were definitely not 90°. Sliding the wood bench pieces in was such a struggle. We had to shave off little bits at a time to make them fit. At one point I got so tired of the micro cuts that I just jammed it into the wall and called it good.
Learning As We Went
I also stained the bench the wrong color at first. It turned out way lighter than I pictured, so I ended up re-staining it darker and honestly, it made all the difference.
For the board and batten, we tried to save money by going with cheaper wood. I’ll be honest: it worked, but it took a lot of sanding to get it smooth and presentable. If I could give one piece of advice: save yourself the extra work and go with the nicer wood.
Look at that stain. Absolutely not.
The Fun Part: Finishing Touches
Once the hard parts were done, adding the hooks, baskets for shoes, and cozy pillows made it all come together. I love styling the space. It’s the perfect mix of practical and pretty.
The completed mudroomSee? It was begging to be a mudroomThe simple black hooks contrast so nicely with the white board and battenThese seagrass baskets look pretty and smell nice
Some of the links in this post are affiliate links. I may earn a small commission if you make a purchase at no extra cost to you.
Abstract Art Print – I saw this in someone’s video on youtube that was like a “Shop with me” at Hobby Lobby. I literally went out and bought it the next weekend! It’s the perfect moody color scheme
Our floral pillow cover isn’t available at IKEA anymore, but it’s a waffle knit texture. I think it helps for it to just have a different texture to add more interest to the solid color
Similar Options:
Similar Baskets – Set of 6 baskets similar in color and same size
Now, I use the mudroom every single day. It’s right by the door we use to come and go, and every time I see it, it makes me smile. The green on the walls might just be my favorite color in the house (and it’s one of the few spaces we’ve actually painted so far!).
We’re not professionals by any means. Just two parents making our home feel like us, one project at a time. This little mudroom corner has become such a warm, happy part of our everyday life, and I love that we built it together.
Love cozy home projects and bookish corners? Subscribe and join me for new posts every week!
If you don’t see the confirmation email right away, check your spam or promotions folder and mark “Not Spam.” Once you confirm, you’ll be all set for cozy updates!